TABLE OF CONTENTS
- Step 1: Setup your Newsletter
- Step 2: Pick a Template
- Step 3: Schedule
- Step 4: Add Articles
- Step 5: Summary
- Reviewing Your Campaigns
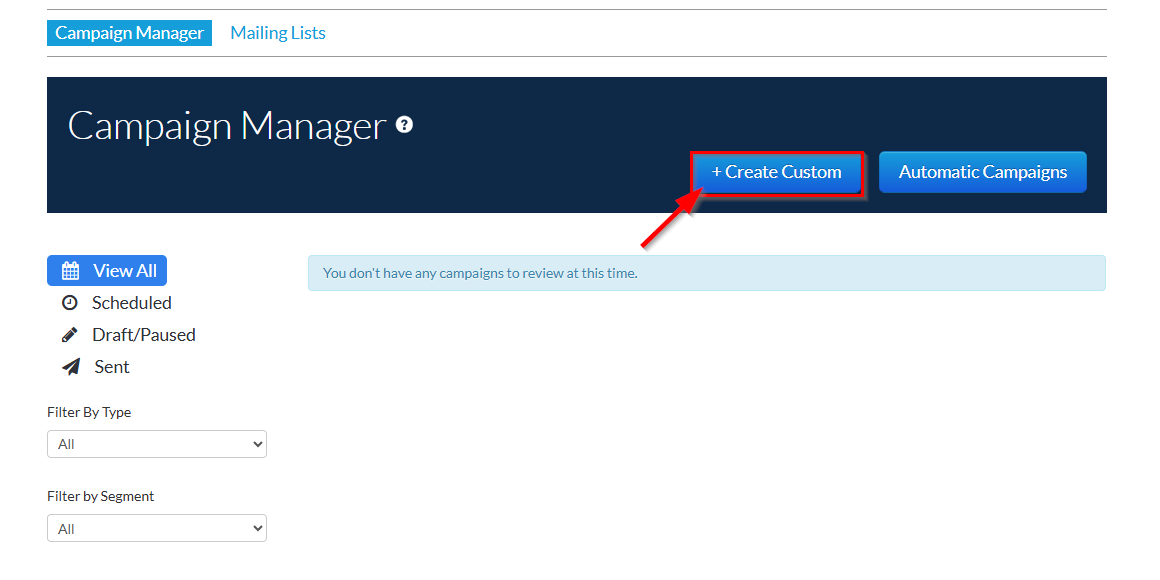
After you've configured your Mailing Lists, you may now create a new campaign. From the Campaign Manager tab, select the +Create Custom button.
Step 1: Setup your Newsletter
1. Complete all required fields under Newsletter Information:
- Newsletter Language: The language used for the sent newsletter.
- Newsletter Title: An internal name for reference (not visible to subscribers).
- Email Subject: The subject line displayed in subscribers' inboxes.
- From Email: The sender address.
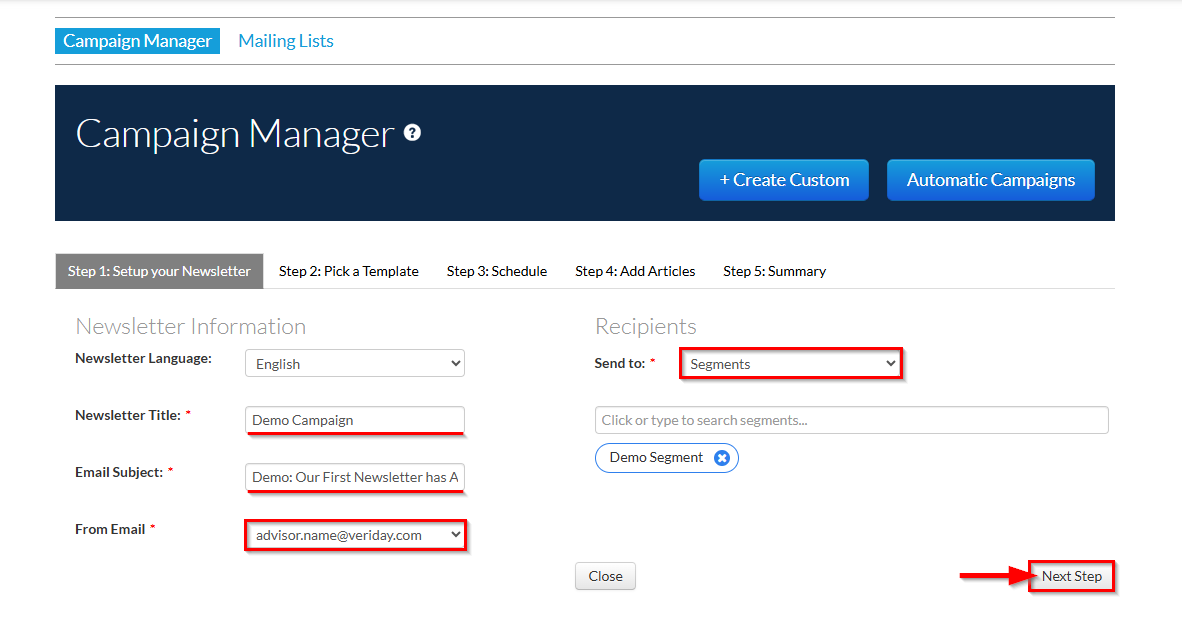
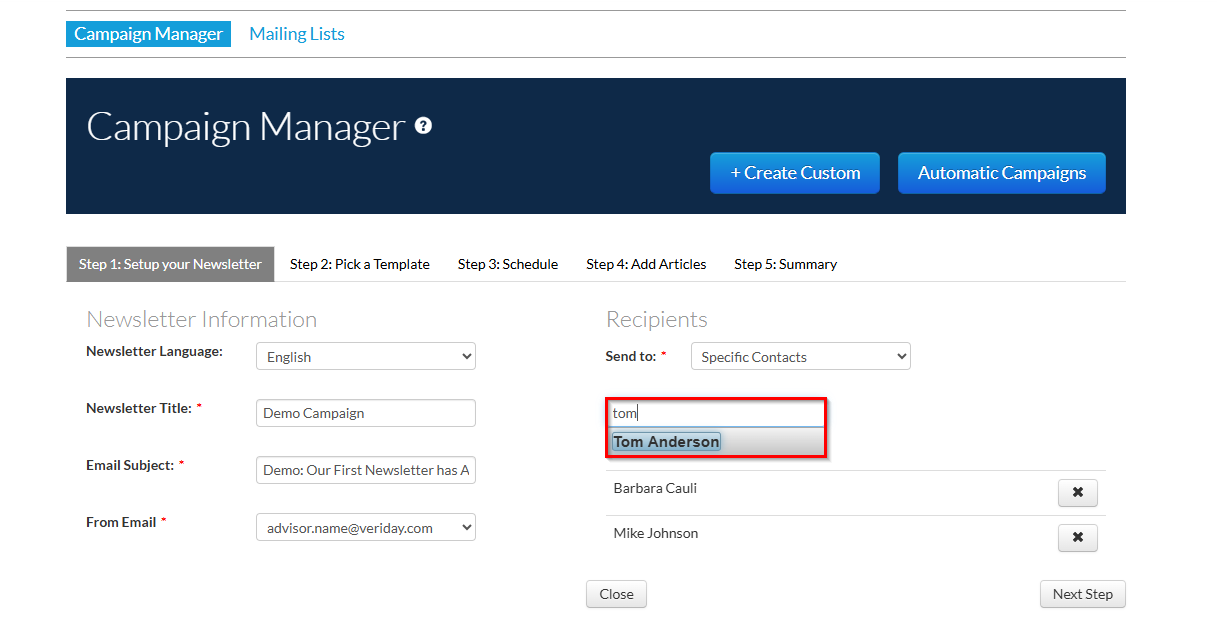
2. Under Recipients, define the audience you'd like to send your newsletter to:
- All Contacts: Sends to every subscriber in your Mailing List.
- Segments: Target one or more defined audience segments.
- Specific Contacts: Choose individual subscribers manually.
Step 2: Pick a Template
1. Choose a layout from the Newsletter Templates designed for your environment or hub.
2. Click Next Step to proceed. (You can click Back at any point to choose a different template.)
Step 3: Schedule
Choose whether to send your campaign immediately or at a future time:
Schedule for Later: Configure the following details:
Timezone: Select the target timezone.
Delivery Settings: Set the exact send date and time.
Preview Settings (Optional): Sends an advance preview to emails configured under your Mailing List's Notification Settings.
Send Campaign Now: Delivers the newsletter immediately after final submission.
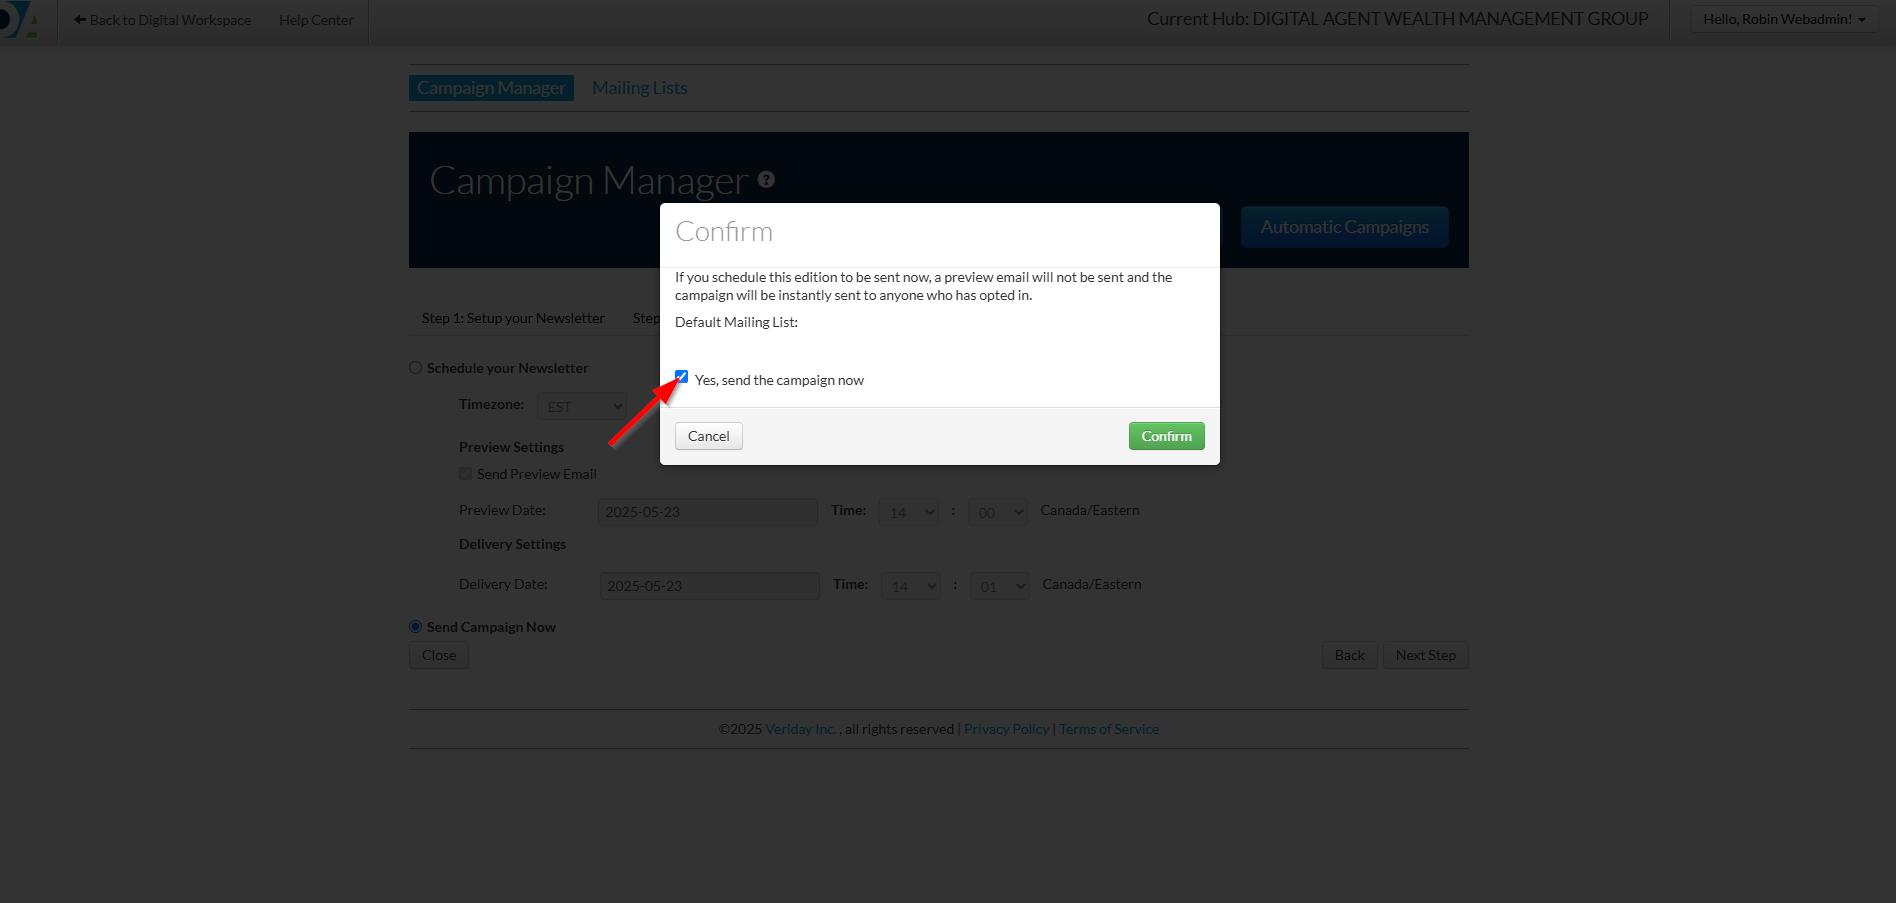
2. Click Next Step when complete.
Step 4: Add Articles
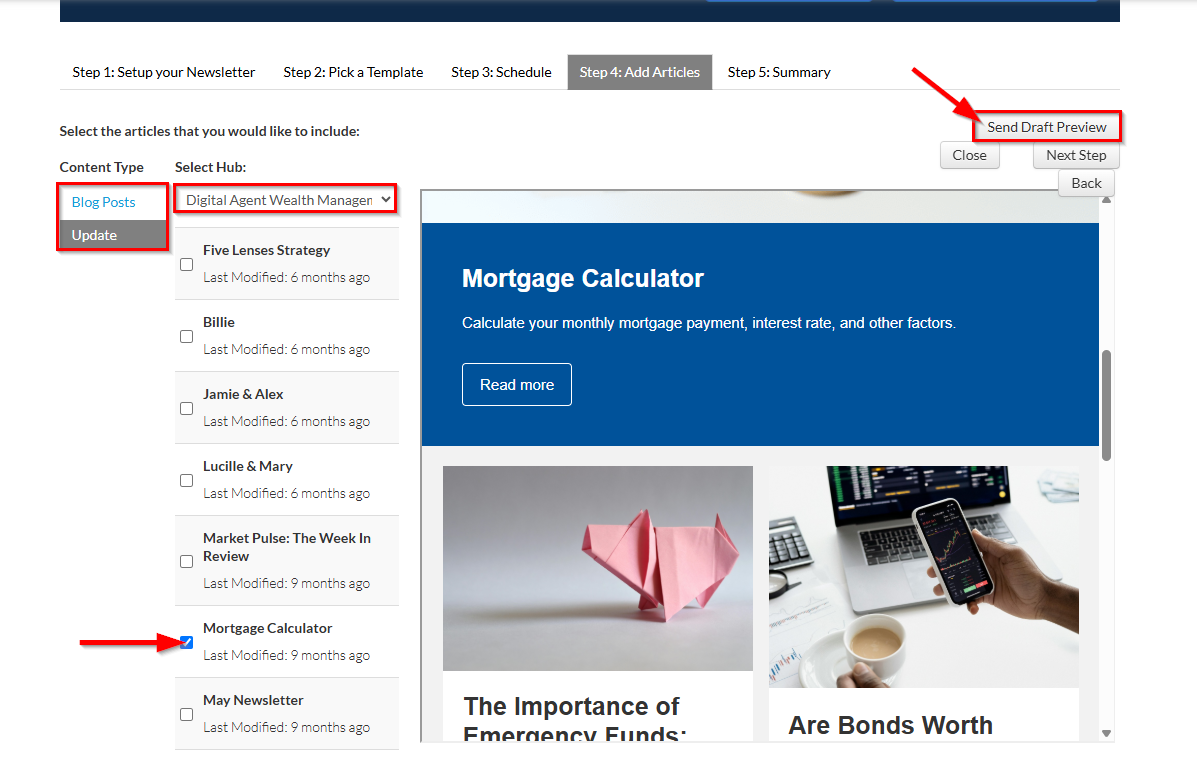
1. Add Blog Posts or Updates from Your Hub or Pre-Approved Marketing Hubs:
Select a content source from the Select Hub dropdown menu.
Check the box beside any article to include it. Selected items automatically populate in the live preview on the right.
Click Send Draft Preview to send a test copy to your inbox.
2. Click Next Step when complete.
Step 5: Summary
This section provides a summary of your campaign details for final review. Once you’ve confirmed everything is accurate, you can choose to:
Save as Draft to return and make edits later, or
Schedule & Send to publish your newsletter to subscribers on the selected date and time.
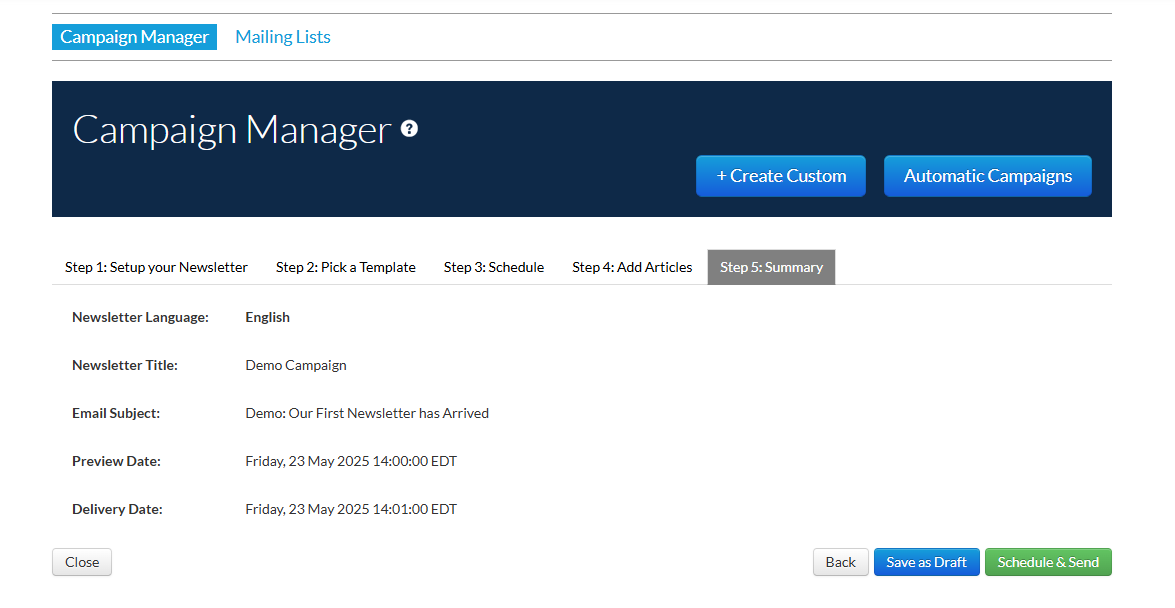
Your campaign will now be visible in your Campaign Manager list.
Reviewing Your Campaigns
Your campaign will now be visible in your Campaign Manager list and you may perform a number of different options, depending on the status of your campaign.
Draft
You may select the Actions menu to Edit or Delete your campaign.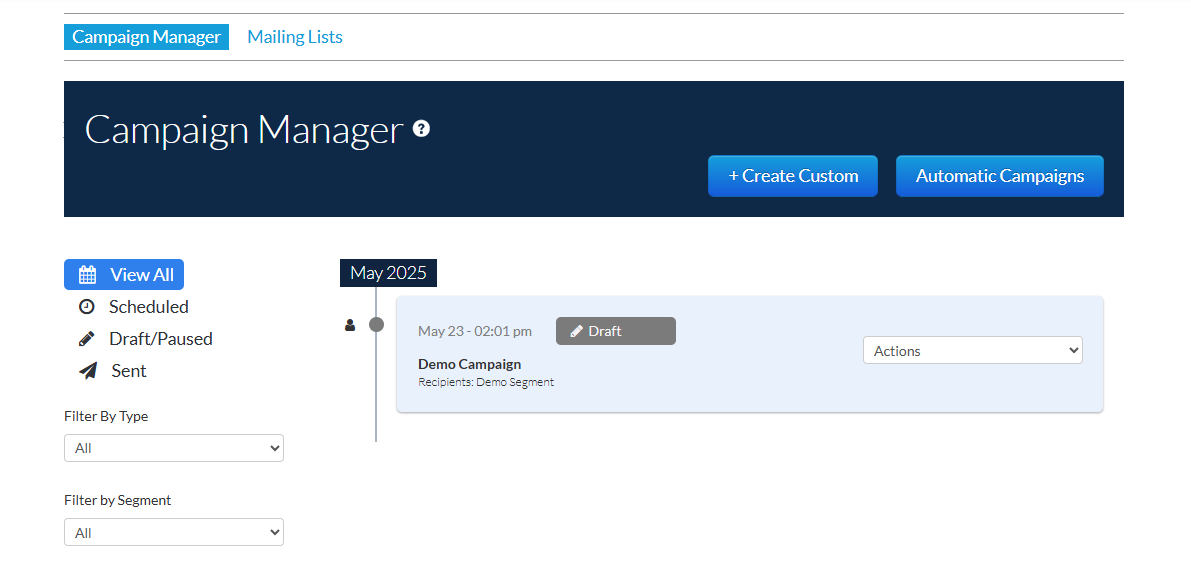
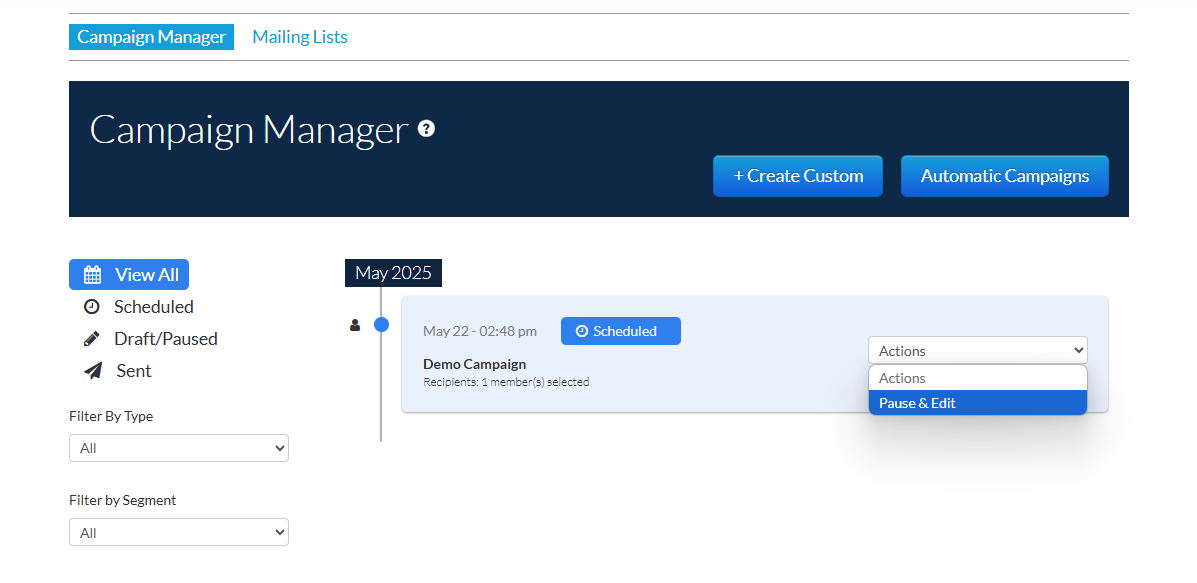
Scheduled
You may select the Actions menu to Pause & Edit your campaign. A Paused campaign acts like a Draft and must be resubmitted in order to unpause.
A campaign that has been configured to send immediately will be ushered into the send queue and will publish within 10 minutes.
Sent
Your campaign has been sent to your contacts. You may not make any further changes after your campaign has been sent.
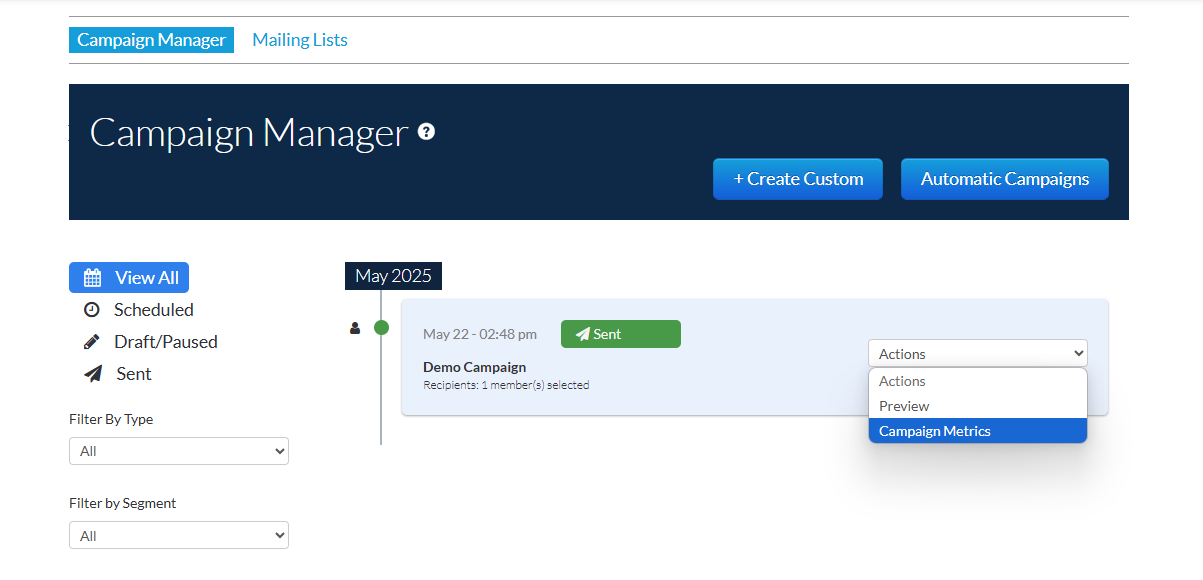
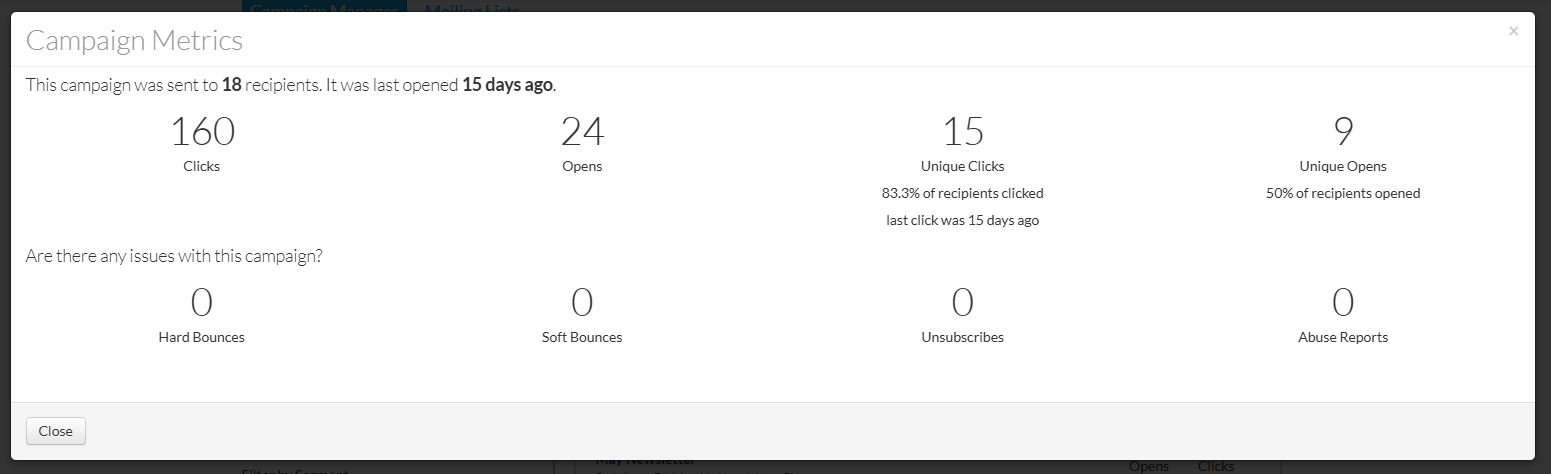
You may select the Actions menu to Preview your campaign or select Campaign Metrics to see how well your audience engaged with your newsletter.
Was this article helpful?
That’s Great!
Thank you for your feedback
Sorry! We couldn't be helpful
Thank you for your feedback
Feedback sent
We appreciate your effort and will try to fix the article