TABLE OF CONTENTS
Creating a Mailing List
Before launching your first campaign, you need to create a Mailing List. This list contains all subscribers who have opted in to receive your emails.
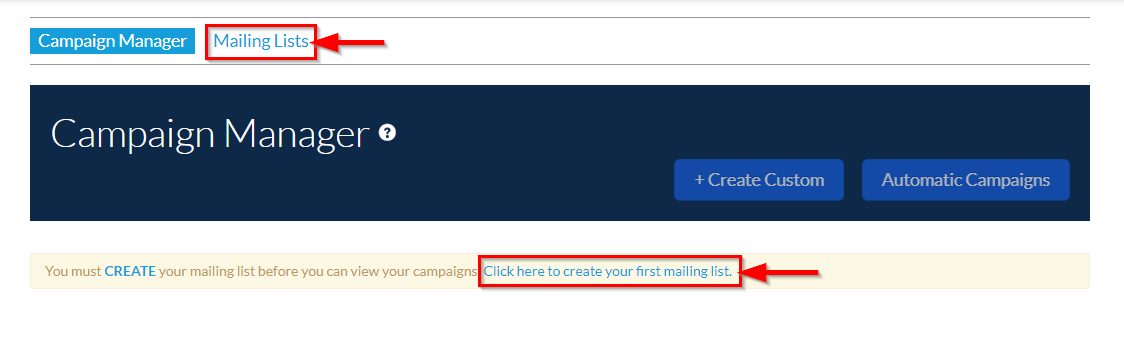
1. Click the Mailing Lists tab or Click here to create your first mailing list.
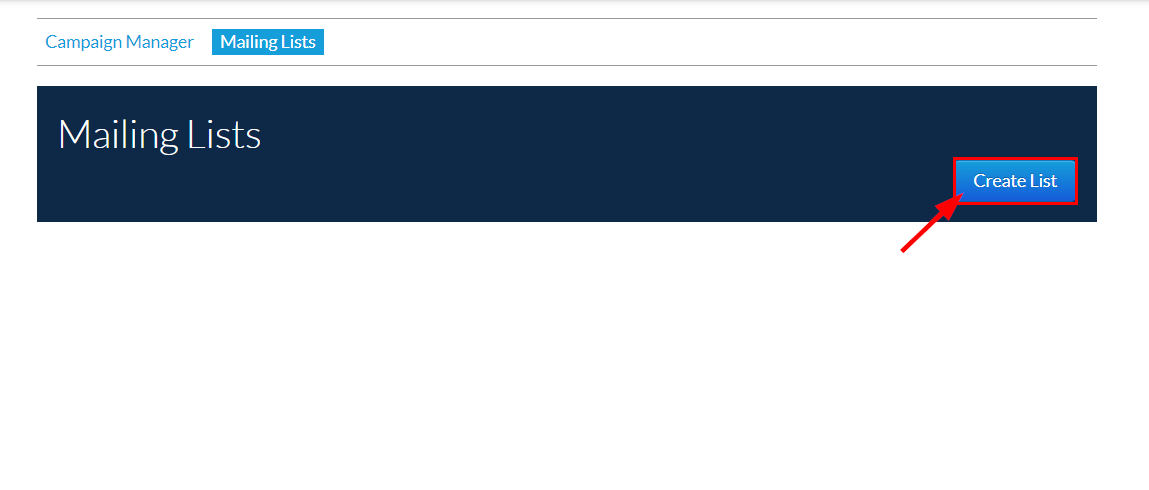
2. In the Mailing Lists tab, click the Create List button.
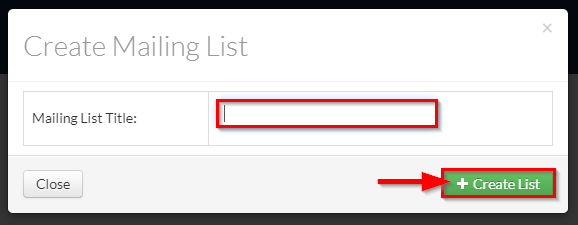
3. Enter a Mailing List Title. This is the title you'll use to refer back to this specific segment of users. When finished, select + Create List.
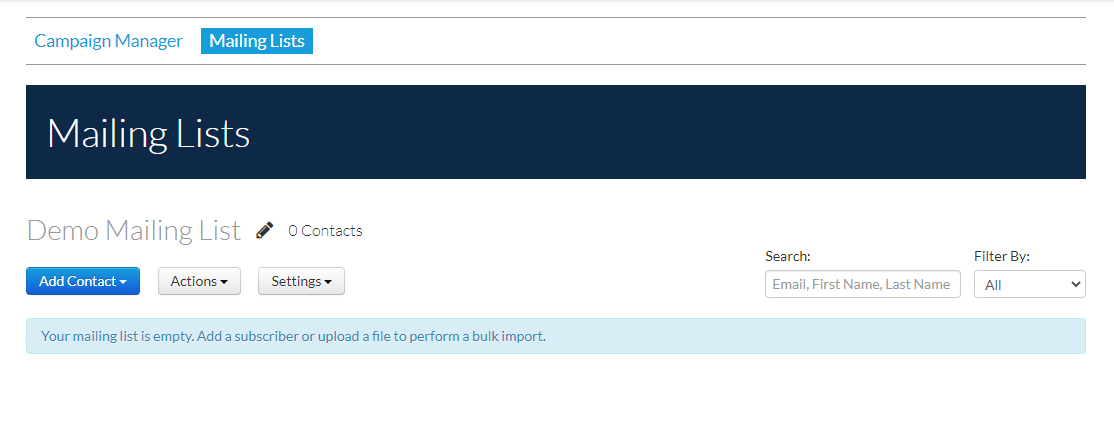
4. You can now begin adding contacts to your list.
Adding Contacts to Your Mailing Lists
Option A: Add Single Subscriber
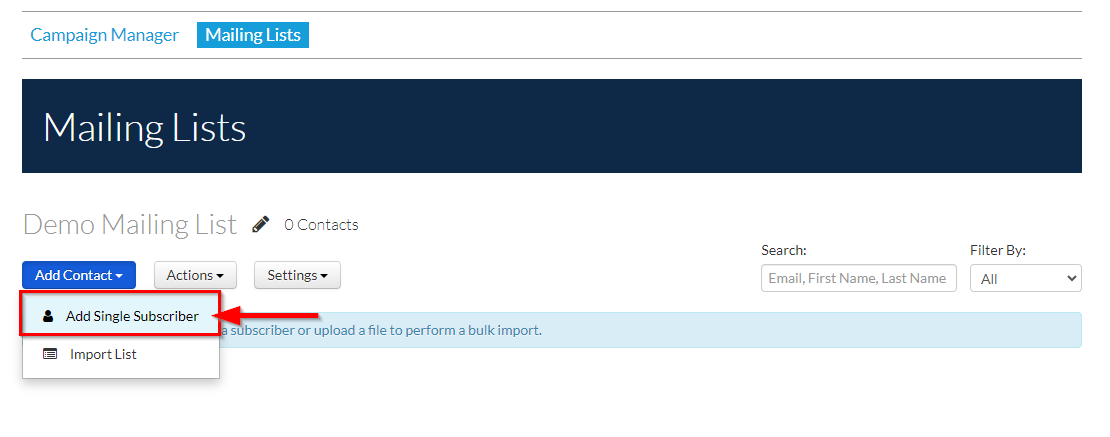
1. Click Add Contact button and select Add Single Subscriber in the drop-down menu.
2. Fill out the contact details. Email Address and Consent are required. (Tip: Adding optional fields like name or location makes targeting audience segments easier later.)
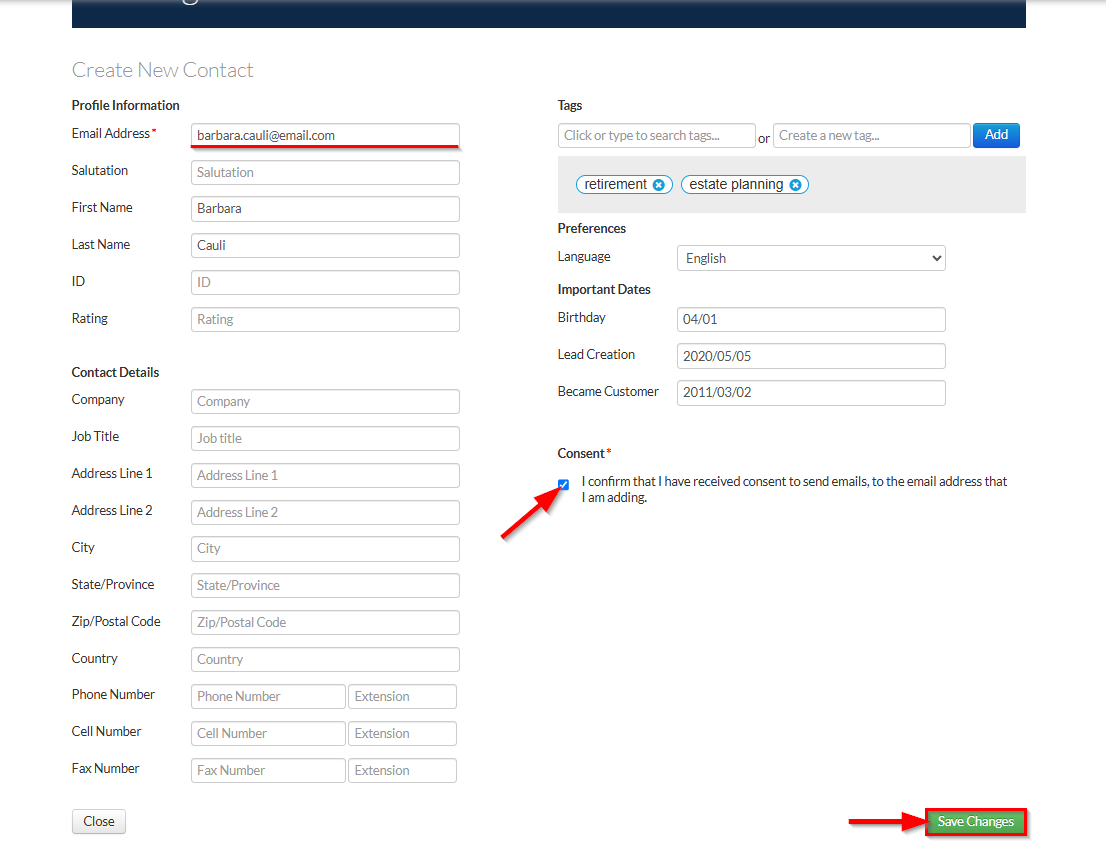
3. When you are finished populating the contact's information, click Save Changes to save your contact to your Mailing Lists.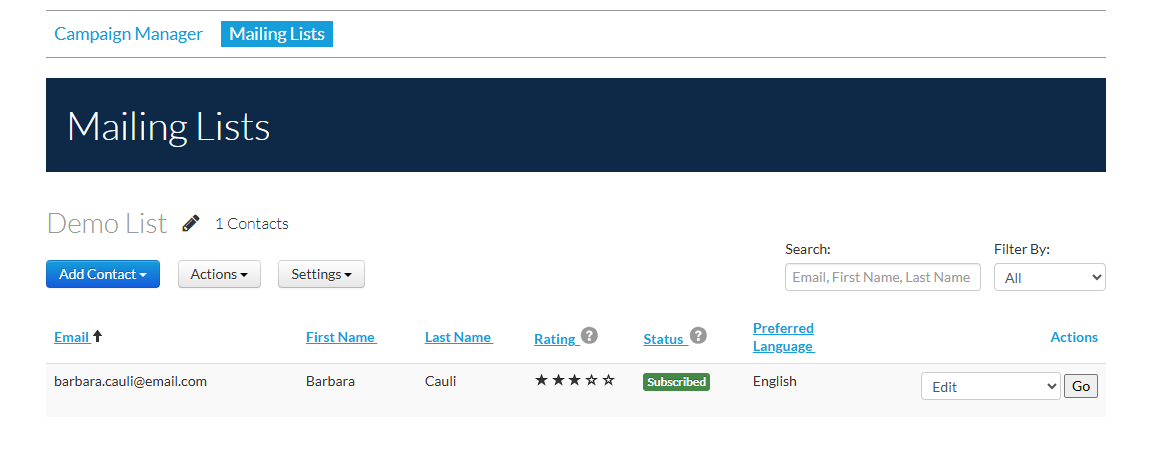
Option B: Import List
Step 1: File Upload
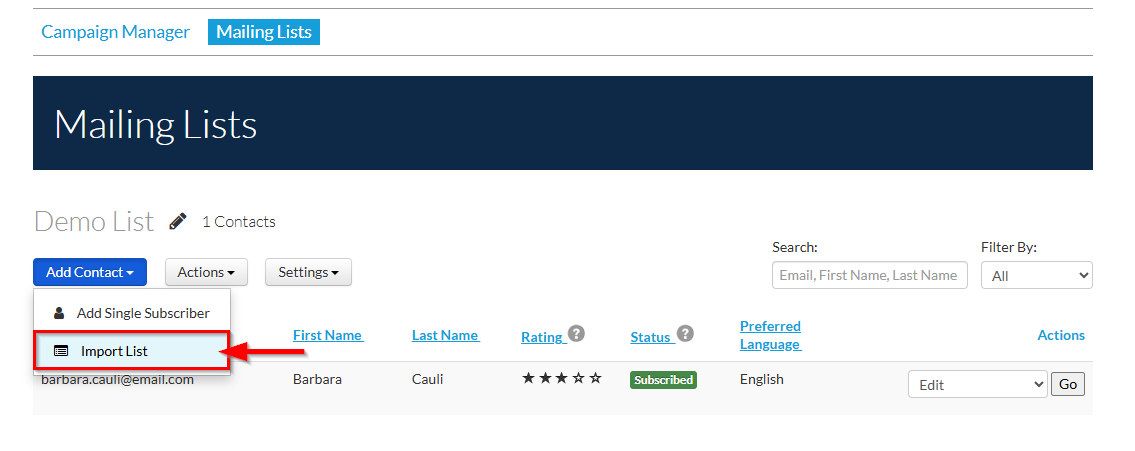
1. Click Add Contact and select Import List.
2. Click the File Upload box to browse your computer, or drag and drop your file. Supported formats: .csv, .xlsx .cls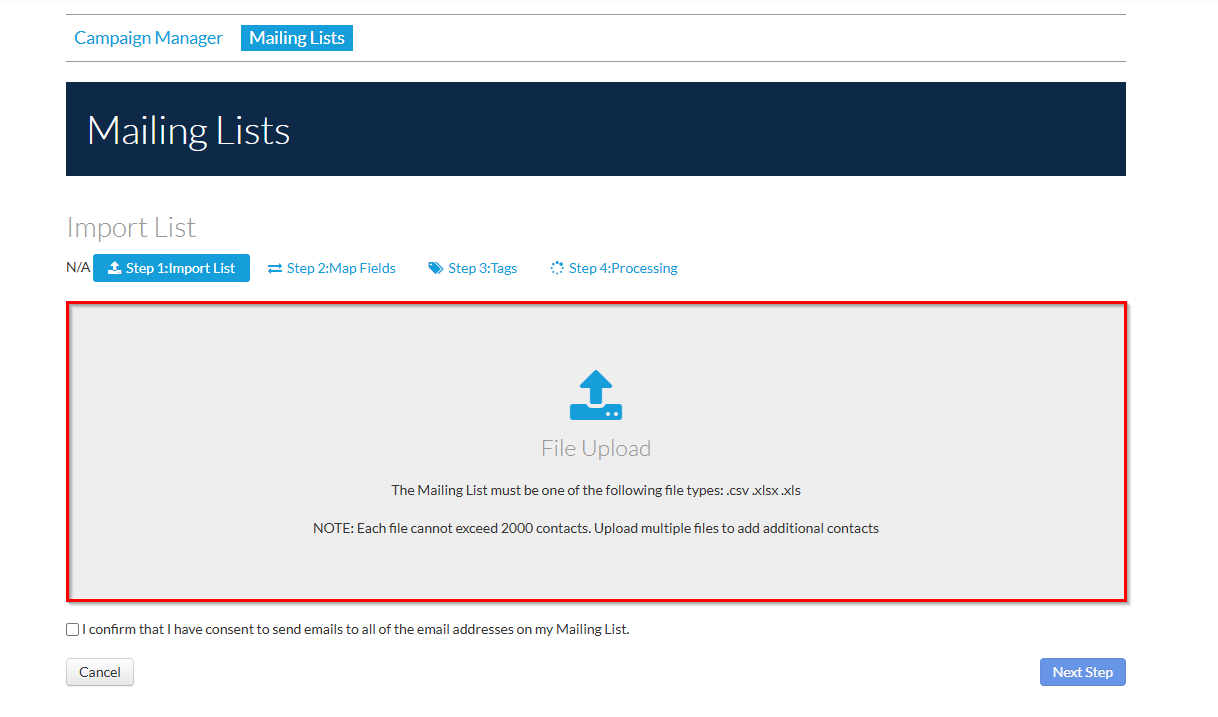
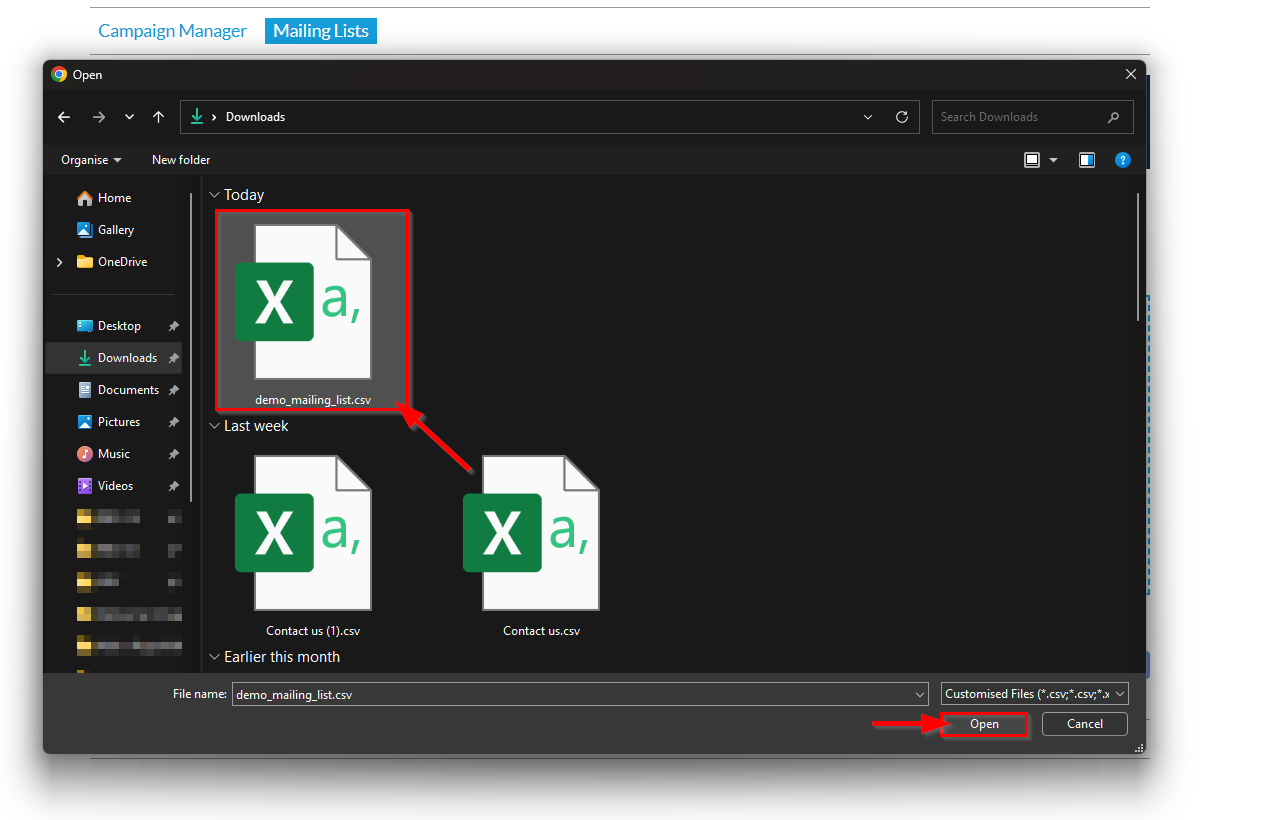
3. Select your file in your File Browser and click Open to load it.
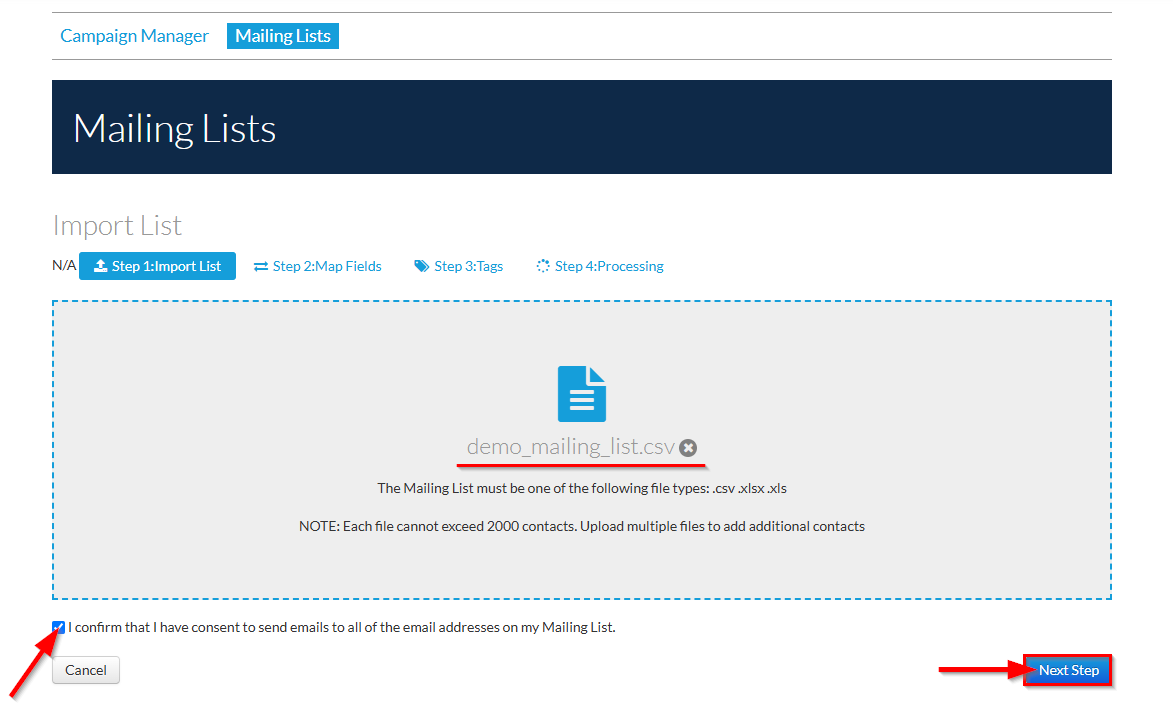
4. You should now see the name of your mailing list file displaying in the upload section. Click the checkbox to confirm consent and select Next Step.
Step 2: Map Fields
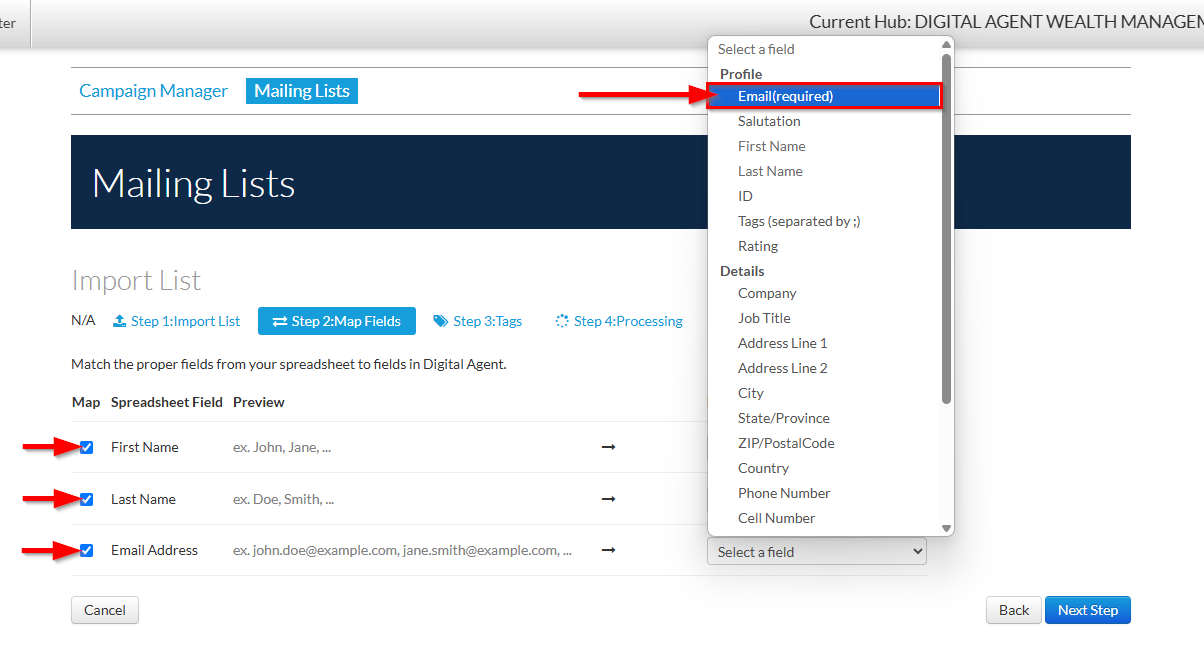
1. This section allows you to map the fields from your mailing list file to corrosponding fields in Digital Agent.
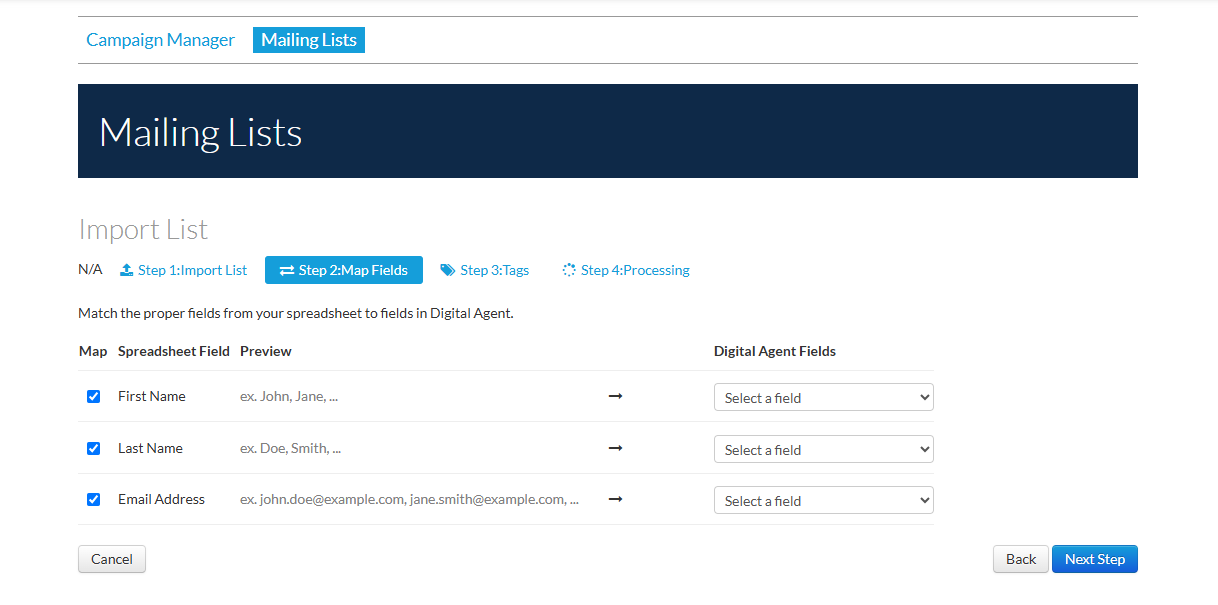
2. You can click the checkboxes on the left to select the fields you'd like to enable, then choose the corrosponding field in the drop-down menu on the right.
Step 3: Add Tags
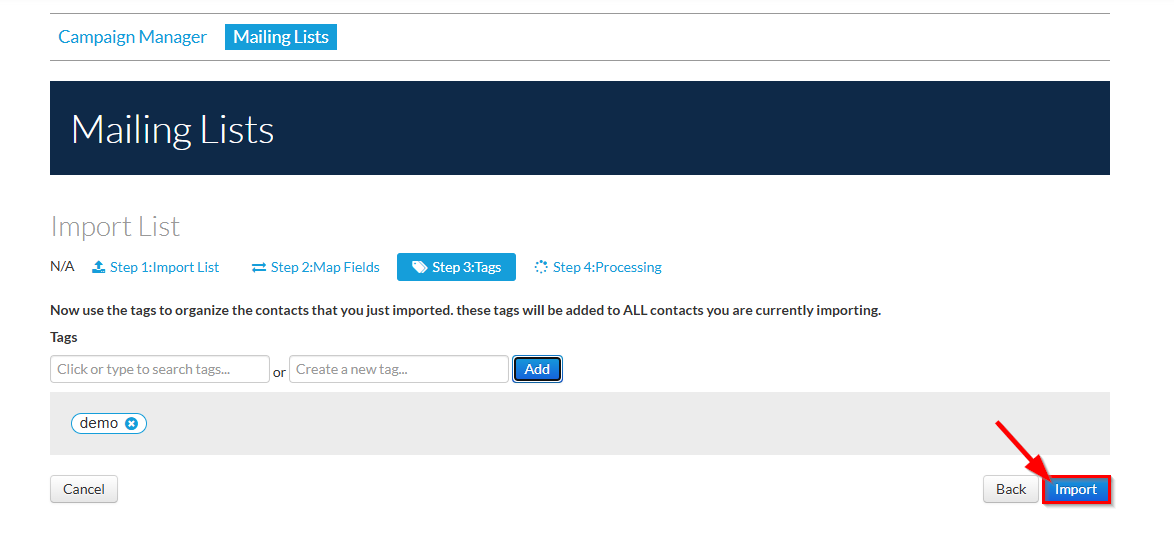
1. On this page, you may either select any number of tags that you have previously added, or create new tags to apply to the list of contacts you are importing. Tags can be used to help organize your incoming contacts after they have been added to your Mailing Lists.
Important: The tags added here will be added to ALL contacts in the list you are currently importing.
Step 4: Processing
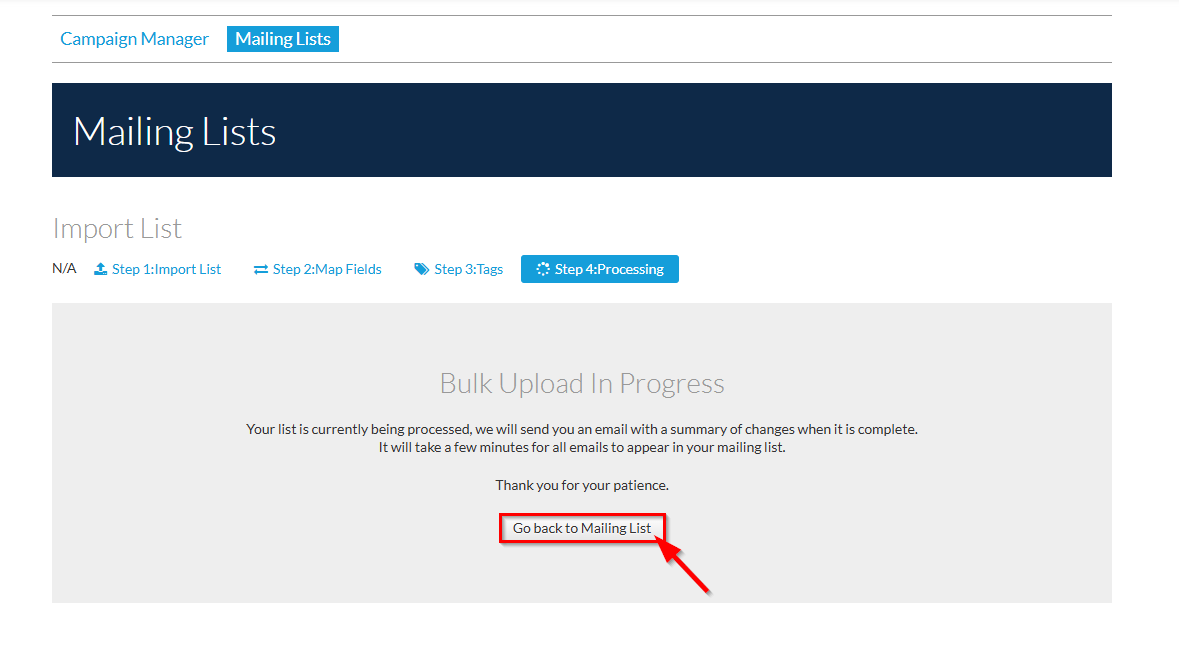
1. Your list of contacts will now be uploaded. You should receive an email once your upload has been completed and you may return to your Mailing List.
2. Once your upload has completed, your list of imported contacts should now be visible on your Mailing List page.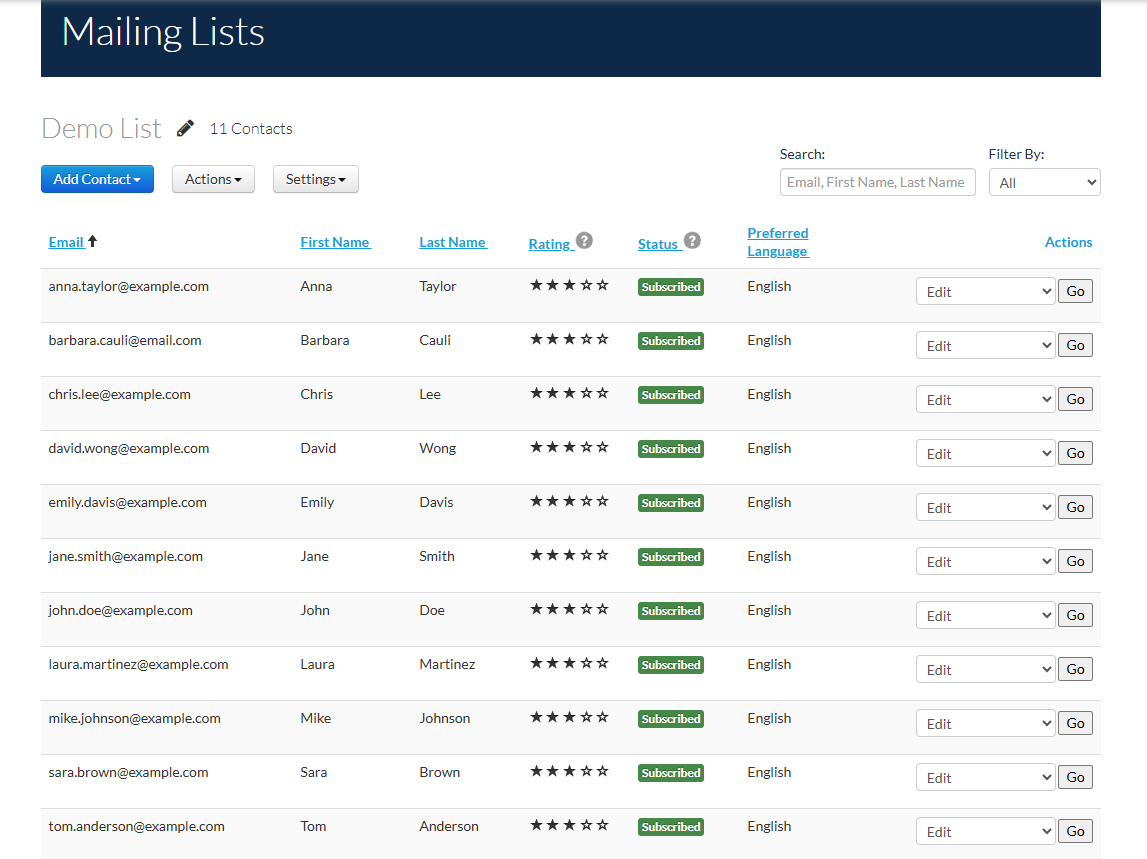
Was this article helpful?
That’s Great!
Thank you for your feedback
Sorry! We couldn't be helpful
Thank you for your feedback
Feedback sent
We appreciate your effort and will try to fix the article