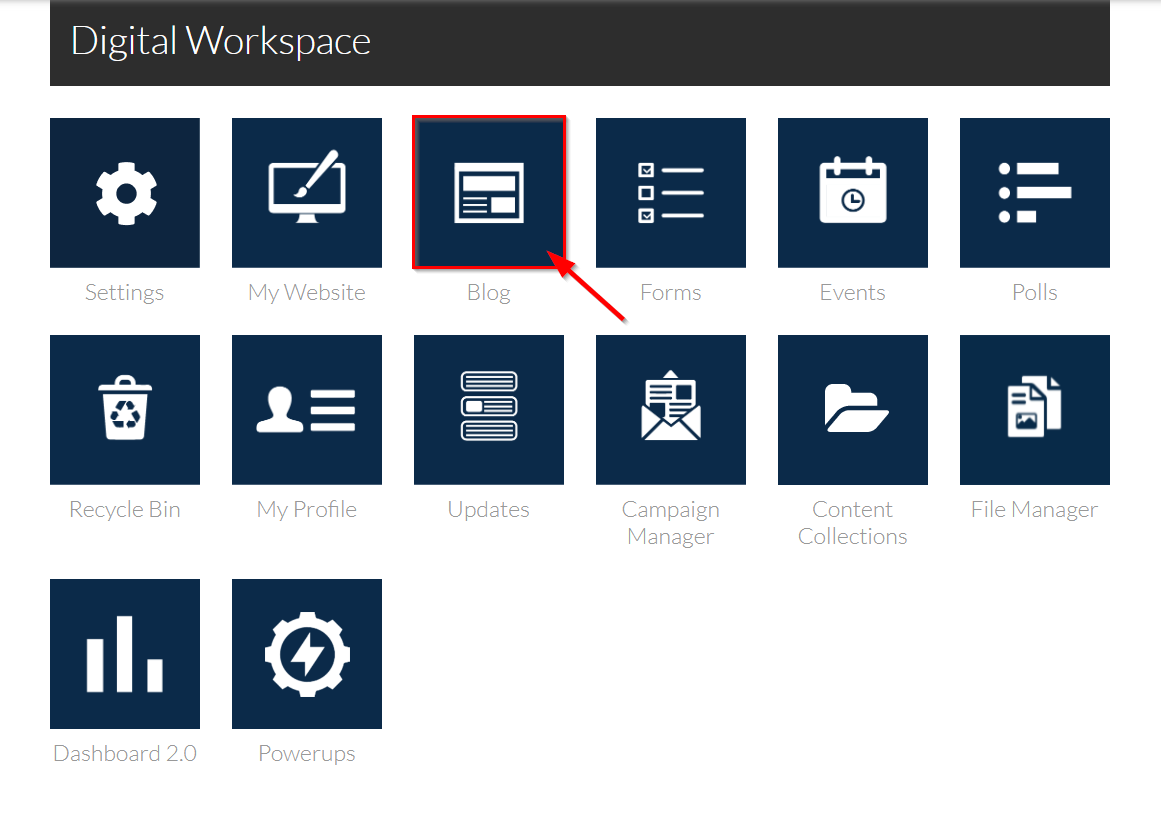
1. Navigate to Blog.
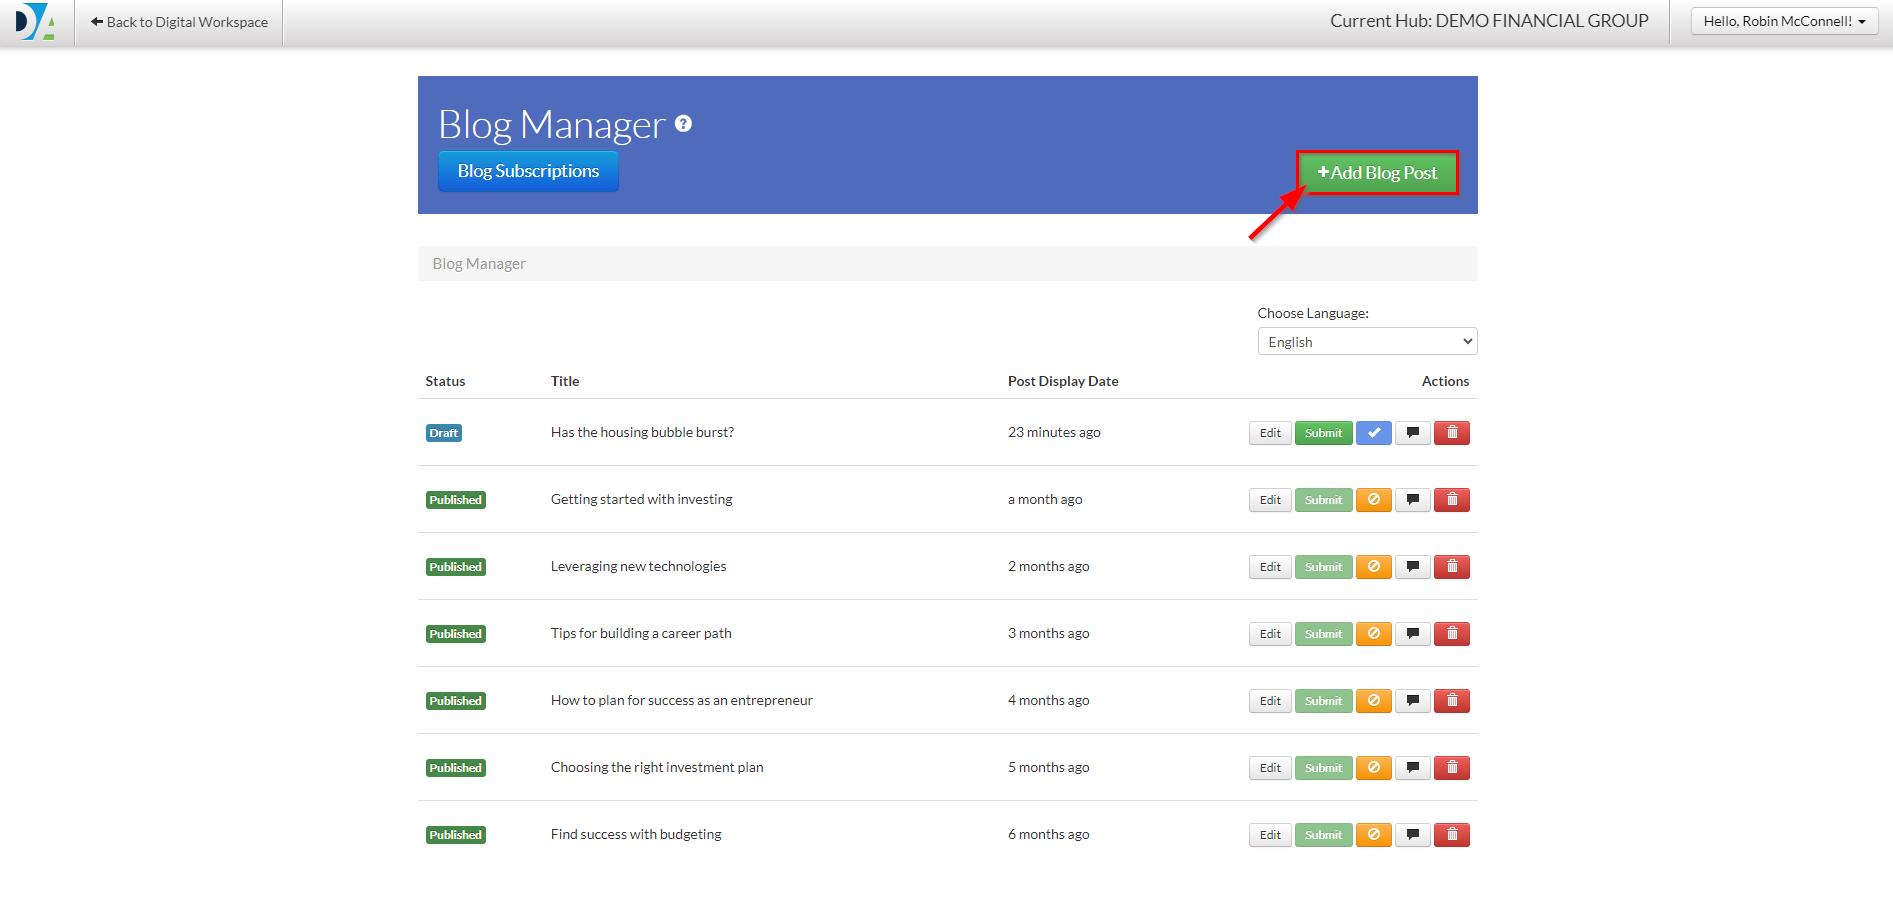
2. Click on Add Blog Post to open the Blog editor.
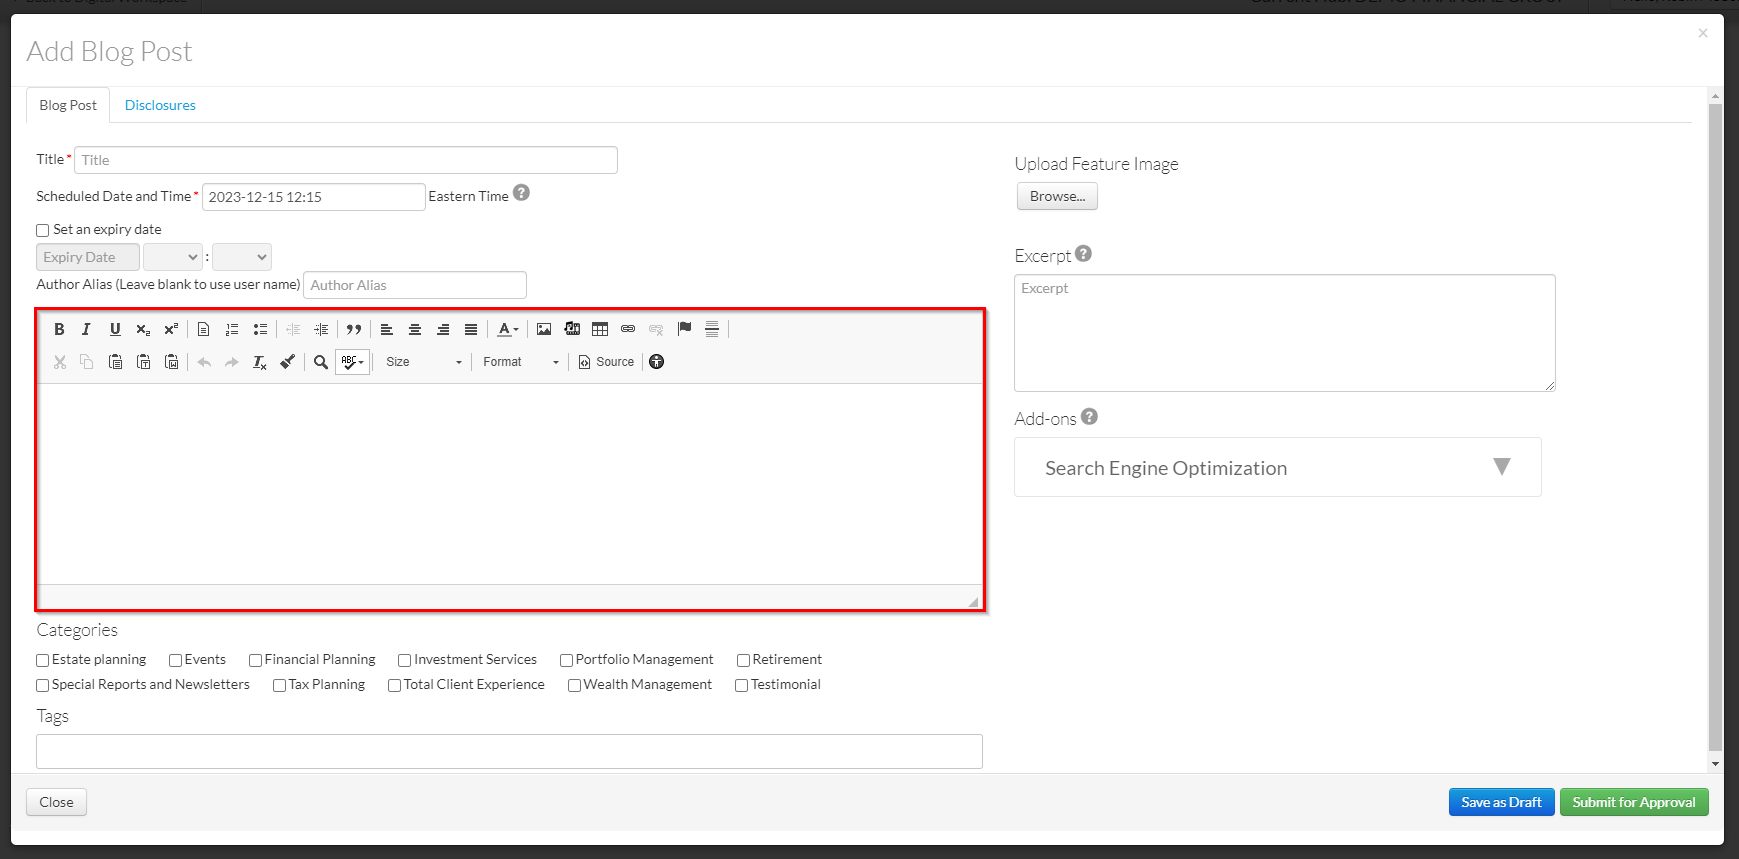
3. Fill in the following fields:
- a. Title: The title of your blog post.
- b. Scheduled Date and Time: The date and time that your blog post will be published. May be scheduled for the future, or in the past.
- c. Set an expiry date (optional): Assigns a date that your content will expire and automatically be removed from your live website.
- d. Author Alias: How the author name will appear. If left blank, this will default to the Primary account name.
- e. UploadFeature Image: Upload an image by clicking the Browse... button and selecting an image from your file browser to help your blog post stand out and attract more attention.
Note: Please first consult with your marketing team before uploading a photo to ensure it has been properly optimized. - f. Excerpt: A concise summary or sentence about your blog post to attract the reader's attention.

4. Use the main editor field below to write or paste your blog content. You can format your text, embed images, and link documents using the standard Web Content Editor toolbar.
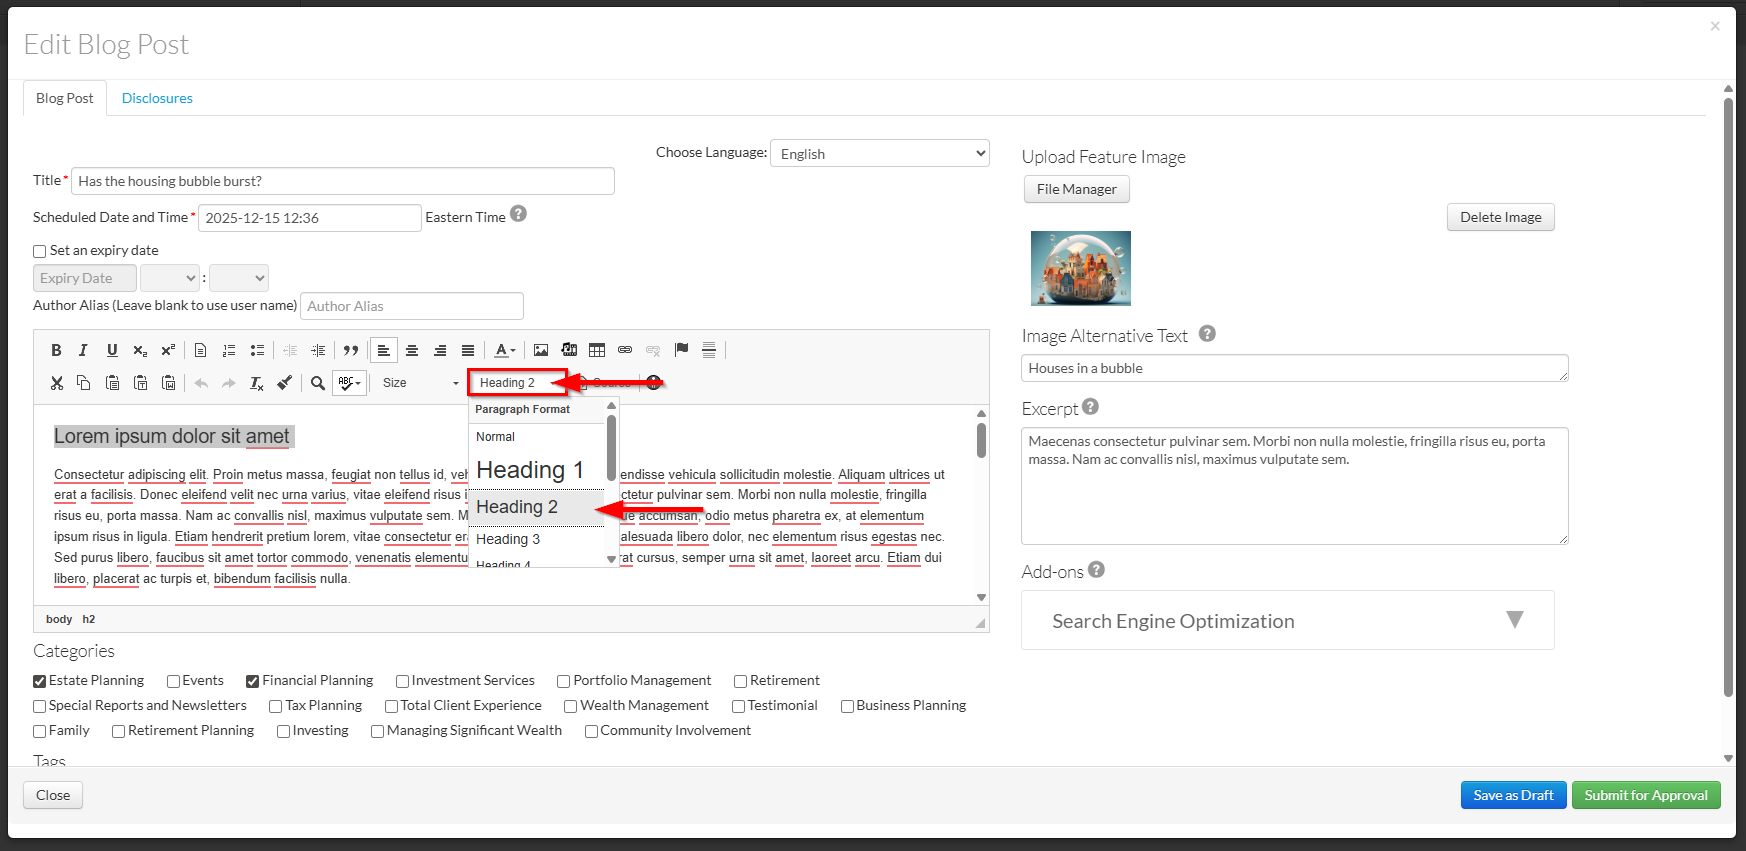
Formatting Tip: If you are pasting text from another source (like Word or Google Docs), highlight the text and click the Remove Formatting button to clear hidden styling overrides.
You can quickly format your text headers using the Format drop-down menu to quickly apply clean, accessible text headers (H2, H3, etc.).
5. Select any relevant Categories from the list to organize your post and make it easier for readers to find.

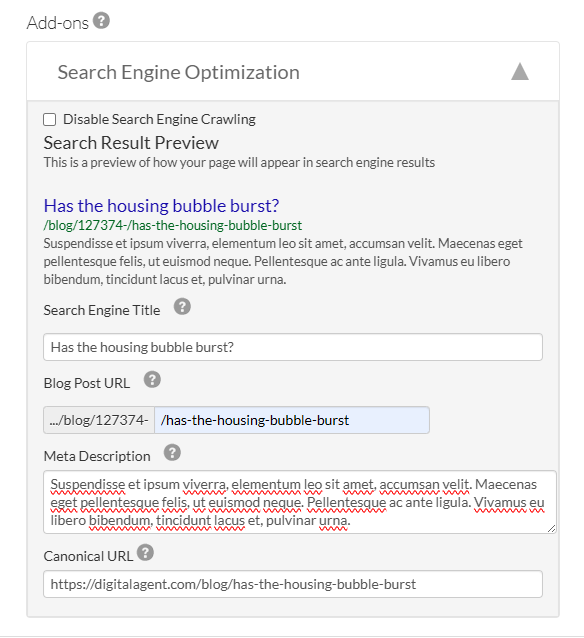
6. Expand the Add-ons section to access and customize your Search Engine Optimization options:
- Disable Search Engine Crawling: Check this box to prevent search engines from indexing your blog post.
- Search Engine Title: The clickable headline that appears in search engine results.
- Blog Post URL: The custom URL slug for the post.
- Meta Description: A brief summary or excerpt displayed below the title in search engine results.
- Canonical URL: The original source URL of the content, used if the post is republished from elsewhere to avoid duplicate content penalties.
7. When you are finished configuring your blog post, choose one of the following actions:
- Save As Draft: Saves the post in a draft state for further editing. The post may be previewed within My Website.
- Submit for Approval: Saves the post and submits it to compliance for review.

Adding Disclosures (Optional)
To add compliance or legal disclaimers to your blog post, refer to: Adding Disclosures to Your Blog Post
Was this article helpful?
That’s Great!
Thank you for your feedback
Sorry! We couldn't be helpful
Thank you for your feedback
Feedback sent
We appreciate your effort and will try to fix the article